
It’s been a while since I’ve posted, closing in on a year, but this year we’ve been busy. This year we decided one of two things…either we were going to move, or we were going to add-on to the house. We started by looking at a really cool farm house, but the interest rates were simply way too high to go the route of buying – especially something as big as the farm house with the property and out buildings that it had. So for now, we opted to go the route of adding on. Our house was built in 1967 – it’s a single story ranch, and only has 1.5 baths. With 3 of us in the house, 1.5 baths is starting to be too little, especially with Riley getting older. What we needed was a master bath suite – and it all started with a piece of paper.
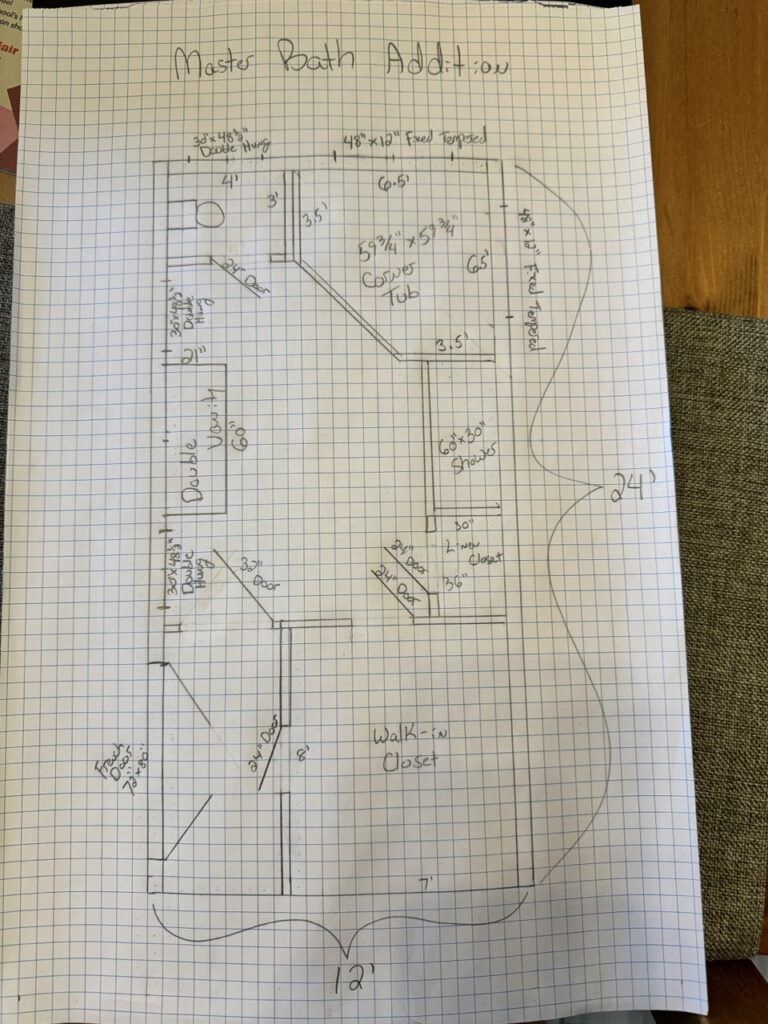
The process started with me drawing up the plans for what we wanted. The addition was going to be 12′ wide by 24′ long, and be attached to the south side of the house at the “master bedroom”. This would effectively turn the house from a long rectangular box into an “L” shape. As you can see from the plans, about 1/3 of the addition was to become a walk-in closet for Meghan and a hallway from our bedroom to the bathroom. The hallway would also include a french door (later it would become a sliding glass door), and the walk-in closet would include an entry from both the hallway and from the bathroom itself. Once you got into the bathroom, a double vanity would be flanked by a window on each side and a toilet would be closed off into its own room at the far end. Next to the toilet in the other corner would be a corner bathtub (we were going to go with a jacuzzi tub but later would opt for a standalone tub), followed by a shower and then a linen closet. The final build would see us swapping the linen closet and shower because of where the drain ultimately would fall for the shower (right on top of a joist).
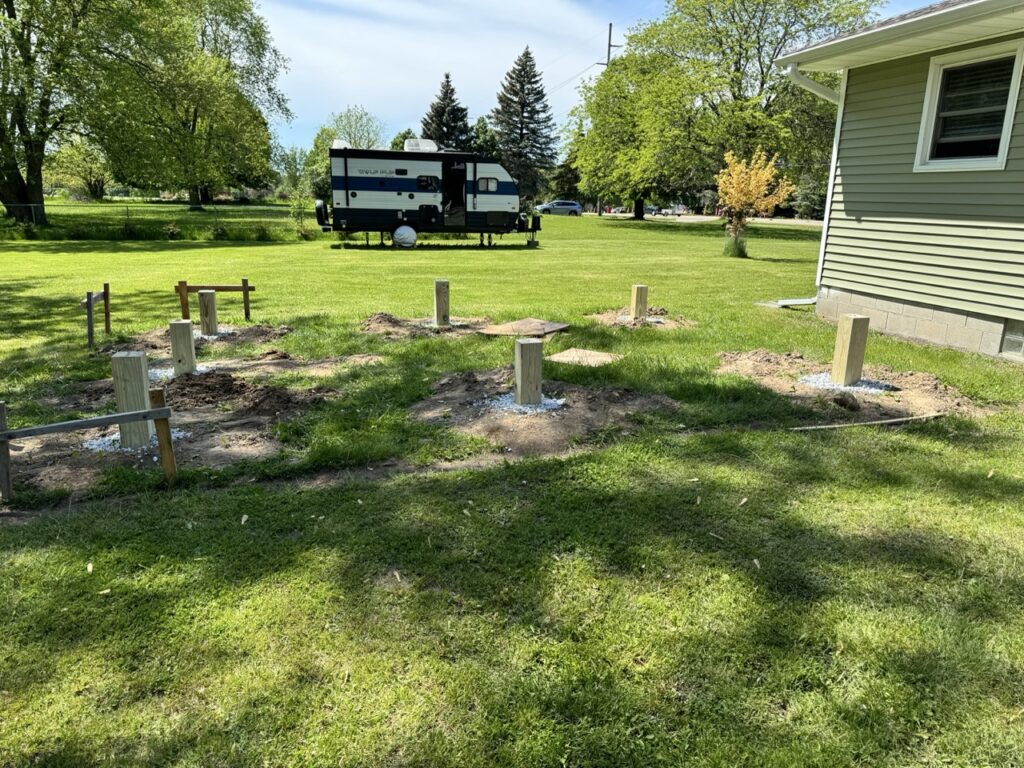
Rather than build a concrete foundation, we opted to go with a pier and beam foundation – which meant there would be a crawlspace underneath. We got to work in late April by digging the holes for the posts. By mid-May, they had been approved and the posts were added.
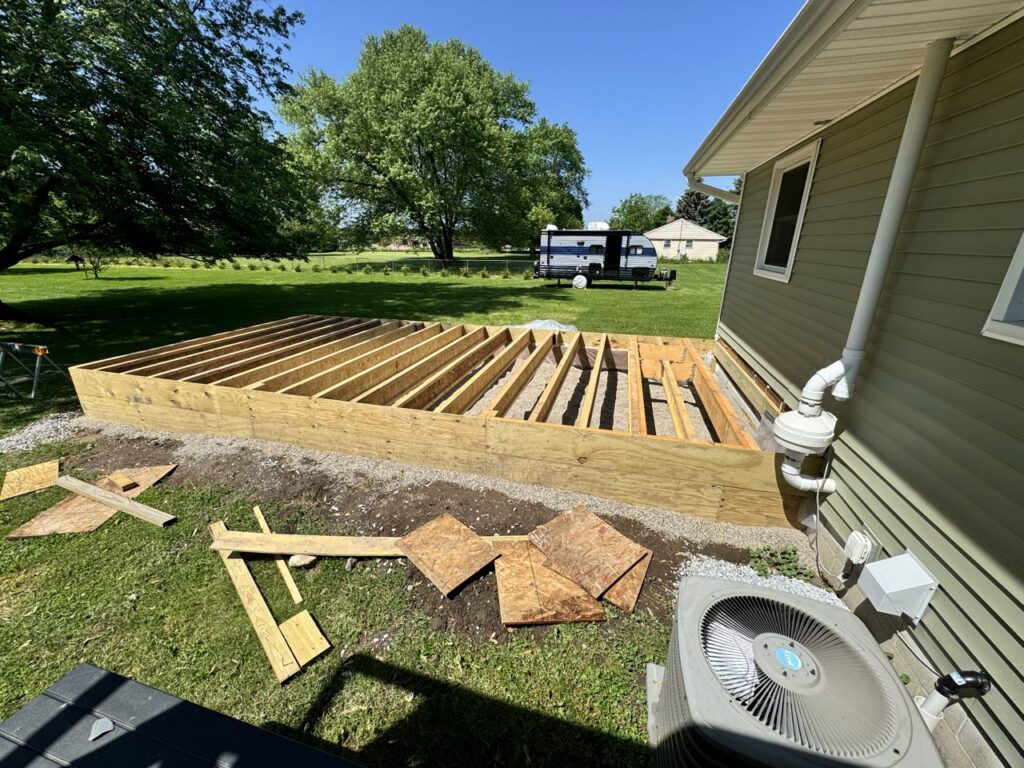
For the next part of the build, I employed my dad who brought some help (Trevor) for building out the foundation and adding the joists. I added in the pea stone on top of the vapor barrier – this was to help not rip the vapor barrier when needing to crawl around once everything was covered.

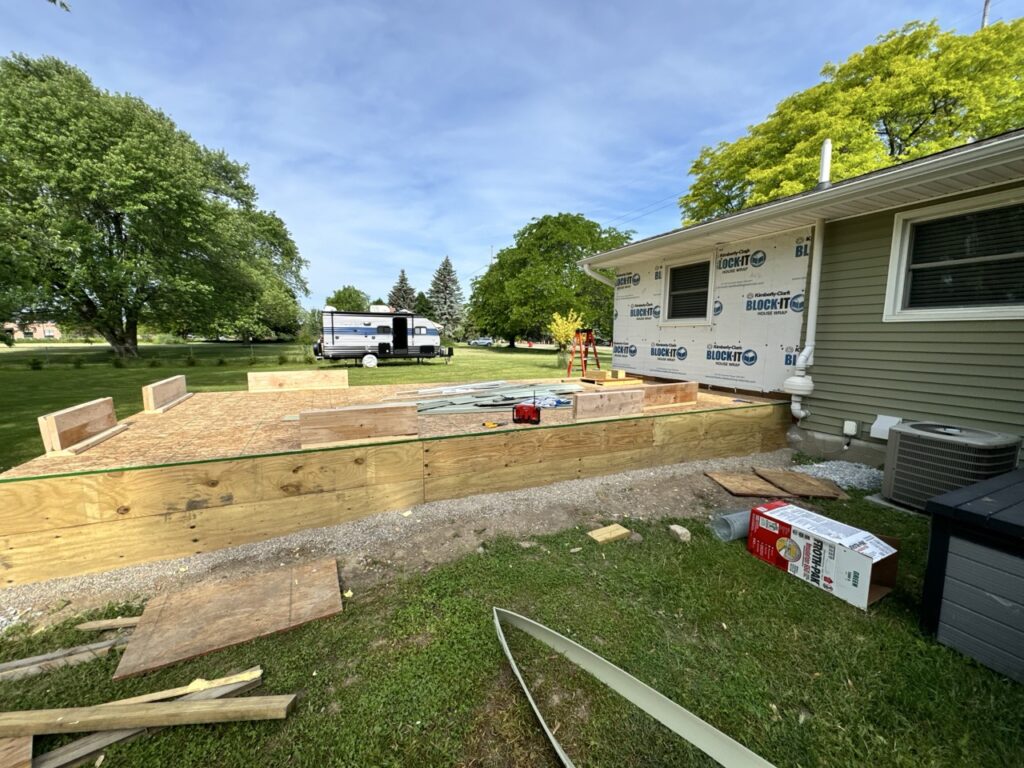
Once all the joists were in, I added the rat wall (the bottom plywood along the foundation). That was a “fun” job, as it had to go several feet into the ground.
The next step, though not shown here, was adding foam insulation around the entire perimeter of the foundation. From there, it was time to add the flooring, which my dad helped out with, and then I began building the required headers for the windows and door.
In the next update, I’ll be showing off the wall and roof build. Stay tuned!